I used an Egyptian cotton hand towel measuring 50cm x 90cm and added a trim to both ends. Both fabric trims are finished off with some co-ordinating piping.
For this project you will need:
1 towel (washed to limit shrinkage!)
Fabric which will fit the width of your towel at whichever depth you like (my top strip measures 50cm x 15cm finished size and the bottom strip is 50cm x 5cm finished.)
Ready made piping or piping cord with bias binding. Enough to make 2, 3 or 4 strips the width of your towel plus 2cm each.
1. Start by measuring the width of the towel you are customising, and then cut a peice of fabric the same width plus 2cm and the depth you would like plus 2cm. This will allow a 1cm seam allowance on all sides.

2. Press down to the inside, your 1cm seam allowance on all sides. This piece of fabric, should now measure the exact width of your towel and required finished depth.

3. Make your piping by flattening out your bias binding which should be 2cm longer than the finished length so that you have a centimetre each end to tuck in, ensuring a neat (and long lasting) finish. Lay your piping cord down the middle, and fold over the edges of the tape so that both raw edges meet, enclosing the piping cord.

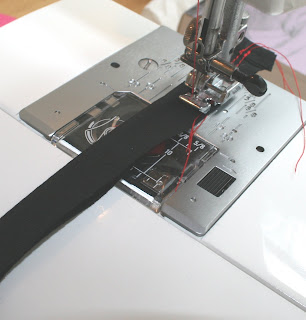
Then sew together with a zipper foot, as close to the cord as possible.

There are 2 ways to do the following step:
5a. (without a top piping) Place your fabric strip right side down where you want your top seam to be, You will have ironed a crease to indicate the 1cm line, but I used a quilting bar to ensure my straight line.

5b. (with a top piping). Insert piping underneath the fabric strip remembering that the raw edge of the piping and the raw edge of the fabric should be together, and sew in place with the 1cm allowance.
6. Flip the fabric over and press in place ensuring that the seam you have just sewn is flat and that the fabric strip fits your towel exactly. Now insert your piping along the lower edge and pin in place ensuring that the ends are tucked in.

7. Sew a line of topstitch starting and finishing at the top right had corner, so that by the time you have finished, the entire panel is topstitched in place. Remember to make sure your piping is tucked in at the edges before you top stitch.


Et Voila!


6 comments:
Great idea - and it all looks very neatly done. Thanks for the tutorial!
Great tutorial. But I feel it's way beyond my skills! Just the thought of binding or piping makes me want to lie down!
What a great idea! I'd like to make some of those to brighten up my bathroom - thanks for the great tutorial :)
xxx
Great tutorial - and I love that fabric :)
Great idea! I think I'd also add a little pocket somewhere on the towel for my membership card or locker key...
That's fab, that is! I've never been brave enough to try piping - but you make it look 'do-able'. Thanks for that. x
Post a Comment